The first time I decided to make cards, I had no idea how to cut my paper the right way or for that matter what the measurements should be. I remember as a child, I would take a piece of construction paper, fold it in half, color or glue something on the front and I was proud of it. To put it in the envelope, I simply folded my card in quarters or in thirds (do you remember that?) But now, I’m older and prefer a different type of card. A couple of years before I became a Stampin’ Up! demonstrator, I decided to make my own cards for Mother’s Day and for several family members who were celebrating birthdays that same week. I was excited so I took out my paper, die cuts or pictures I printed on my computer to color (I didn’t have stamps). It took me F O R E V E R to get it done. I think I stayed up all night so I can have them ready the next day and was still finishing them up that morning. I was frustrated that it took me such a long time, so I know how it feels when you see handmade cards and you’re trying to figure out how to make them, but don’t know how. That’s why I started this series to help you make your own cards and avoid being frustrated like I was.
Cutting Cardstock
First thing we need to do is cut our cardstock (paper). But before we do that, let’s talk about paper. There’s a lot of paper out there and if you go to your neighborhood craft store, you can get it at a good price with your coupon, and that’s good, BUT when you’re making a card, you want quality paper. One of the first things I noticed, as well as my class attendees, is that when a Stampin’ Up! cardstock is held for the first time, you can tell the difference in the thickness between Stampin’ Up! paper and craft store paper. The average weight for the craft store paper is 65 lb where as Stampin’ Up!’s Whisper White, Very Vanilla and colored cardstock is 80 lbs. The thick Whisper White and Very Vanilla cardstock is 100 lb. Both the 80 lb and 100 lb cardstock are acid and lignin free which means that the paper won’t break down and become acidic and yellow over time.
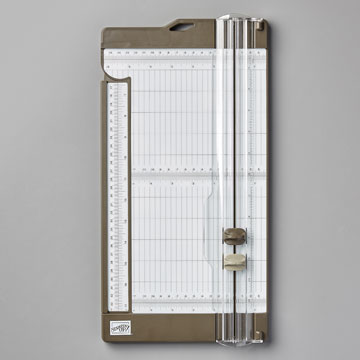
As we mentioned in part 2 of this series, you will need a good quality trimmer to cut your paper. Why? Because this is where the magic of creating a professional looking card begins. Your blade needs to be sharp so you don’t have ragged edges. You want a nice big platform to lay and cut your paper.
There are several ways to cut your cardstock to create your card bases. Using an 8-1/2″ x 11″ cardstock, place the long edge of your cardstock (11″ side horizontally) on the top and the left edge at the 5-1/2″ mark – this is a half sheet of paper. Making sure your paper is straight, and your cutting blade is at the top, hold down the arm and slide blade all the way down.
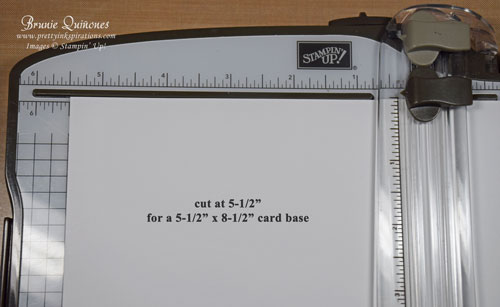
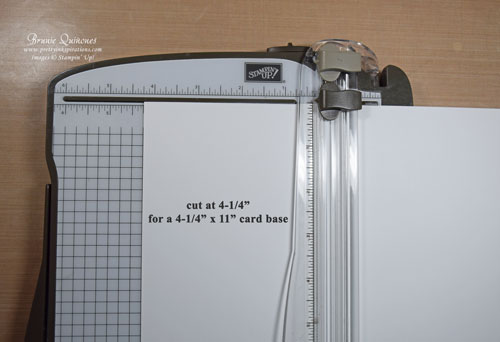
Now you will have 2 sheets of paper cut at 5-1/2″ x 8-1/2″. Another way to cut, is to place your short edge (8-1/2″ side vertically) at the 4-1/4″ mark. Again, make sure your cardstock is straight and cutting blade on top and cut all the way down. This will give you 2 sheets of paper cut at 4-1/4″ x 11″.
To create a layer on top of your card base, cut paper at 5-1/4″ x 4″. This will give you an 1/8″ border all around.
Scoring Cardstock
Now that that you have your cardstock cut, we need to score it for a nice crisp professional crease. The Stampin’ Up! Paper Trimmer comes with a scoring blade as well so you can use that to score your paper.
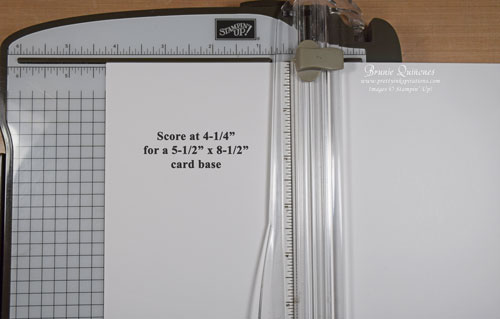
Let’s begin with one of the the 5-1/2″ x 8-1/2″ sheets. Place the long edge along the top and left edge at the 4-1/4″ mark. Using the scoring blade, while holding the arm down, slide it all the way down. Repeat the same steps for the other 5-1/2″ x 8-1/2″ cardstock.
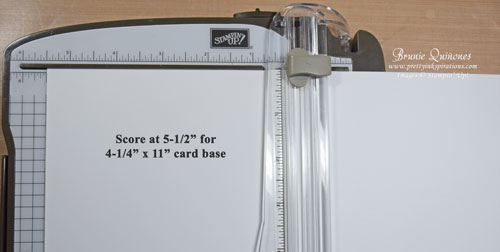
Now let’s take the 4-1/4″ x 11″ cardstock. Place the short edge along the top and the left edge at the 5-1/2″ mark. Repeat for the other half sheet.
See indented scored line
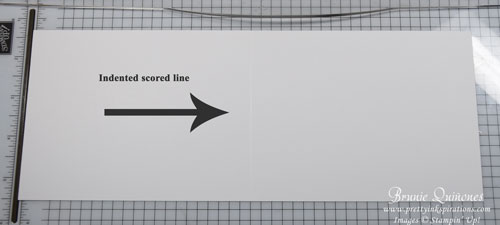
Fold each of the 4 scored sheets of cardstock away from the indented line (outward) and using a bone folder glide it across the fold on the long side of bone folder, not tip.
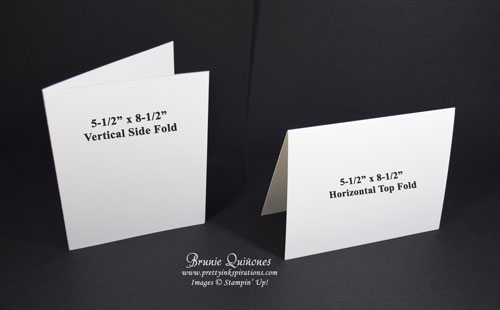
By cutting and scoring these 2 sheets of paper, you have 4 card bases with 4 different folds. The 5-1/2″ x 8-1/2″ will give you a vertical side fold and a horizontal top fold.
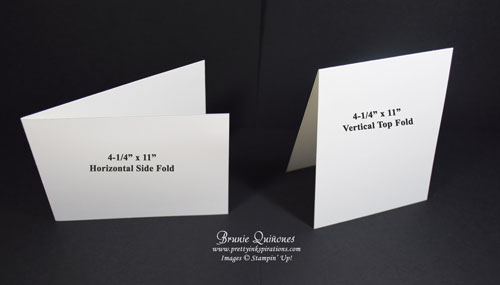
The 4-1/4″ x 11″ cardstock will give you a horizontal side fold and vertical top fold.
Another tool option for scoring is the Simply Scored Tool. It’s a base slightly bigger than 12″ x 12″. The base plate has grooves at 1/8″ intervals and a ruler on top and on the left side.
Now you are ready to create your card bases! If you have any questions, let me know in the comment section below. Next Card Making For Beginners topic: how to stamp.
Thanks for stopping by . . . till next time . . . happy cutting . . . Brunie
If you would like to purchase any of the products below or any other products, please visit my online store. Please use host code GU62WJYGand thank you for choosing me as your demonstrator.


[…] Part 2 of this series, we went over the basic tools you need to get started with making cards. Part 3 we discussed how to cut and score your cardstock. Today I’ll show you how to stamp your […]
[…] In Part 3 of this series – we learned how to cut and score our cardstock and how to make 4 different card folds out of two 8-1/2″ x 11″ cardstock. We made 2 horizontal cards and 2 vertical cards. If you need a refresher, please see this post. […]
[…] miss Part 5 in the series. Tomorrow we’ll be focusing on card layering. See Part 1, Part 2, Part 3 and Part 4 of this […]
[…] you need a refresher on how to cut cardstock click here. I love the vibrancy of this card. How about […]