Welcome back!
In Part 3 of this series – we learned how to cut and score our cardstock and how to make 4 different card folds out of two 8-1/2″ x 11″ cardstock. We made 2 horizontal cards and 2 vertical cards. If you need a refresher, please see this post.
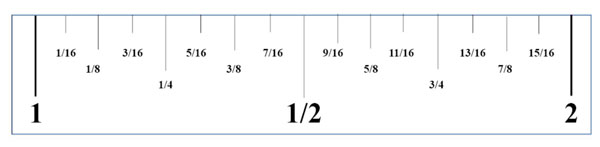
Today, we are going to build on that card base. Some people have trouble with card layers, but I’m going to show you how simple it is. Sometimes one of the reasons for the confusion begins with the ruler and how to read it. We all know where the 1/2″ and 1″ mark is, the trouble begins with all the other ruler increments. Do you know how to find 3/8″, 5/8″, 7/8″ or 5/16″?
I’ve created an expanded ruler below with all the measurements in an inch. When you look at a ruler, every inch has 16 tick marks. If you’re ever in need of cutting something at 1-5/16 for example, just count the ticks from the 1 and you’ll get to the 1-5/16. The same goes if you need to cut at 1/8″, 1/2″, 7/8″, etc. When I need to cut at 3/8″ or 5/8″, I always remember that 3/8″ is two ticks before the 1/2″ and 5/8″ is 2 ticks after the 1/2″. Hope this is clear and I haven’t confused you.
Let’s move to cutting layers for our card bases. The first thing you need to know is that your aim is to have an even border on all sides when it is centered and placed on your card base. You will cut from 2 sides of your cardstock to achieve this. Let’s look at different layer cuts with a 5-1/2″ x 4-1/4″ card base that was cut in half from an 8-1/2″ x 11″ cardstock. Whether the card base is vertical or horizontal doesn’t matter – the rules are the same for both orientations.
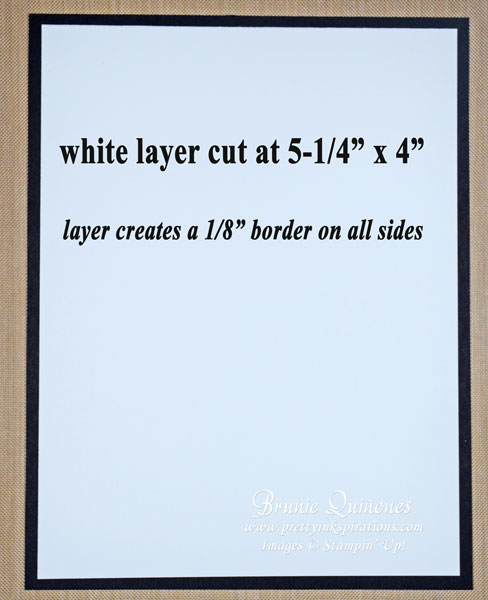
Here we have a black card base cut at 5-1/2″ x 4-1/4″. The white layer was cut on one side at 4″ and the other side at 5-1/4″. Notice how the border is even on all sides of the black card base with a 1/8″ border on all 4 sides.
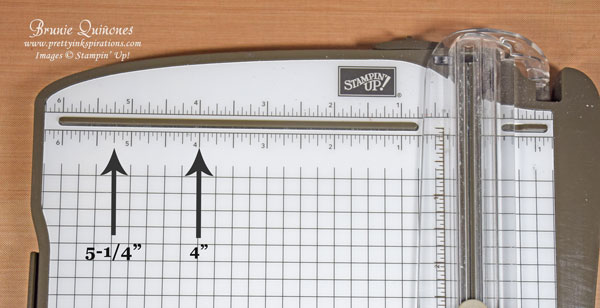
Your cardstock to be layered is placed at the 5-1/4″ mark on the trimmer and cut. Then turn your card once and cut at the 4″ mark.
Did you know that each square on the paper trimmer grid is 1/4″? That’s helpful when cutting and aligning your cardstock.
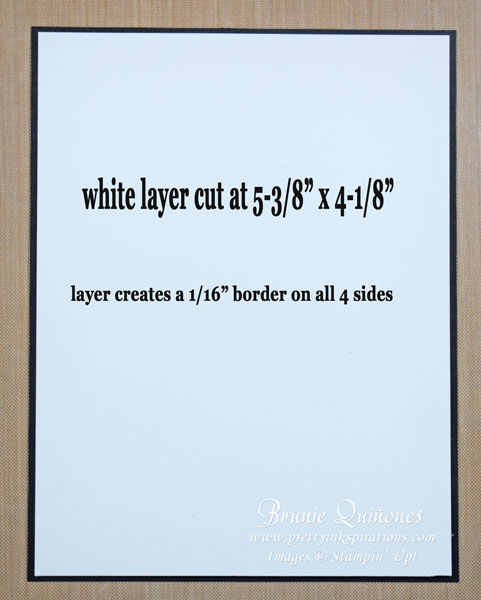
Again, black card base is 5-1/2″ x 4-1/4. This time we have a smaller border for the card layer. The border is 1/16″ on all sides.
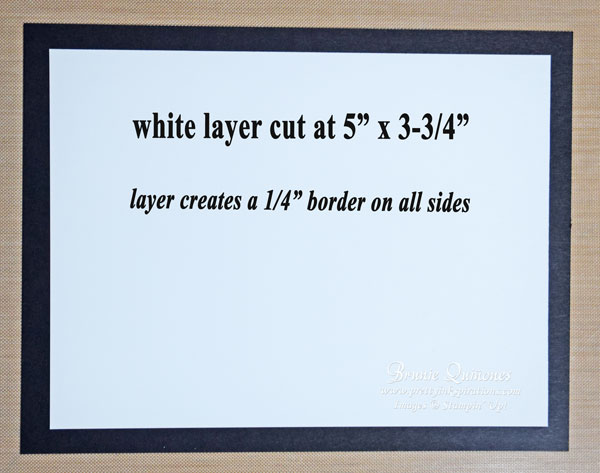
Here we have a wider border cut at 5″ x 3-3/4″ leaving a 1/4″ border on all 4 sides.
Although there are other ways to layer, these are the basic layer cuts to get started with your card making.
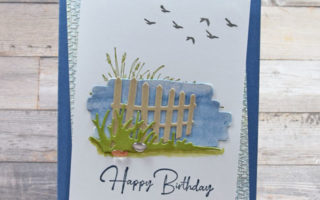
Here’s an example of a card that was layered with an 1/8″ border using the same colored cardstock as the base. I stamped the feathers in 4 different color ink, stamped the sentiment with black ink and stamped the small square image with VersaMark – a watermark ink. #simplestamping.
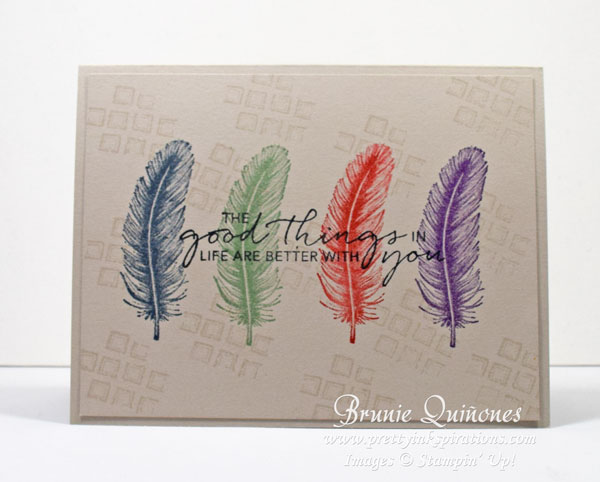
Layers can be adhered to your card base with your favorite adhesive and they can also be raised by using Stampin’ Dimensionals. You can even sponge the edges of your layer before adhering to your card base in order to give it more dimension. We’ll discuss this in another post.
I hope you now feel confident in cutting layers for your cards. If you have any questions, feel free to leave me a comment below.
Thanks for stopping by . . . till next time . . . Brunie
If you would like to shop for any supplies for this card or other items, visit my online store.
- Stamps – Tasteful Touches
- Cardstock: Sahara Sand
- Ink: Misty Moonlight, Mint Macaron, Poppy Parade, Gorgeous Grape, Memento Black, VersaMark
- Accessories: Stampin’ Up! Paper Trimmer