Do you have a place for everything in your house–specifically in your craft area/room? Organization makes things easier when you’re creating because you don’t have to waste time looking for things – you know exactly where they are and can begin creating immediately. For the next several weeks, I’ll be doing a few posts on organization. Today’s post will cover organizing your cardstock.
I LOVE organizing my supplies and I’m always trying to find more efficient ways to store it. Since the main element in cardmaking is cardstock, it’s important for me to have it organized. I would love to have lots of space to store my cardstock horizontally with each of the colors having their own slot on a cube shelf but due to my room built in’s and sloped ceilings, I don’t so I find the best arrangement with what I have to work with.

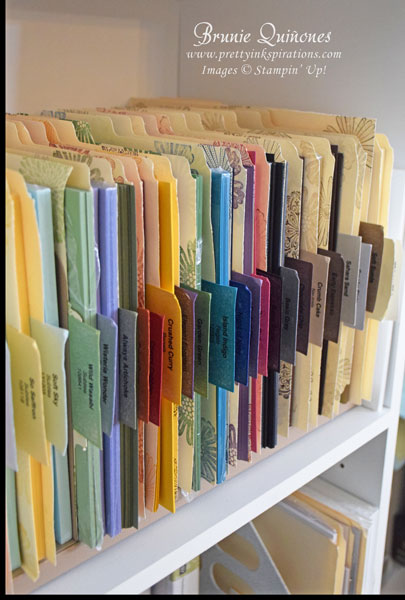
I store all my 8-1/2″ x 11″ Stampin’ Up! cardstock in their color collections on a shelf in my bookcase. I made dividers out of manila file folders, made tabs with the color of the cardstock and adhered a clear label with the name of the cardstock and catalog item number. I also stamped the manila file folder in the appropriate color (this is obviously optional – just wanted to give the folders some color). If you want to splurge, you can always get sturdier plastic dividers. I’ve had this set up for several years and the dividers are holding up just fine and was not costly.

I organize them by color collections but you can also organize it by different shades of the same color hue so you’ll have all your pinks, reds, blue, etc. together.

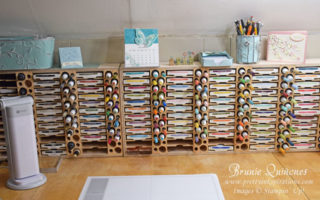
My 12″ x 12″ cardstock is stored in a separate cube shelf. I don’t own every color so I don’t have dividers. On the first shelf I store all the specialty paper such as glimmer, corrugated, cotton paper, foil and Color Me Irresistible Special Designer Series Paper. The 2nd shelf I store the 12″ x 12″ solid cardstock and the rest of the shelves I store the 12″ x 12″ Designer Series Paper stacks as well as the 6″ x 6″ paper stacks. In one of the shelves I store extra 8-1/2″ x 11″ packs of cardstock since I don’t have anywhere else to store it – works for me. If you have the room, the best place to store it would be with the rest of your 8-1/2″ x 11″ paper.
When you organize your cardstock you know exactly what you have in your stash and won’t order more than you need or not have enough of the color you need for your project.
How do you organize your cardstock? Leave me a comment below. Come back tomorrow and see what I do with leftover cardstock scraps.
TOMORROW IS THE LAST DAY OF SALE-A-BRATION!!
HERE ARE THREE THINGS YOU DON’T WANT TO MISS OUT ON:
- For every $50 order, you receive a FREE item from the Sale-A-Bration catalog.
- Save on a 3-month and one year Paper Pumpkin subscription – ends March 31. Remember there will be a special stamp set in the April Paper Pumpkin, so if you want to get in on the fun and are not subscribed yet, make sure you do so by April 10. Click here to subscribe (and don’t forget to choose me as your demonstrator).
- Do you want a discount on your Stampin’ Up! products? Join my Stampin’ Up! team now for ONLY $99 and get $155 worth of products and FREE SHIPPING! BEST DEAL!!! Click here to join.
Shop for Stampin’ Up! supplies, clearance rack or this week’s deals at my online store and you’ll receive a thank you card from me.
Thanks for stopping by . . . till next time . . . Brunie