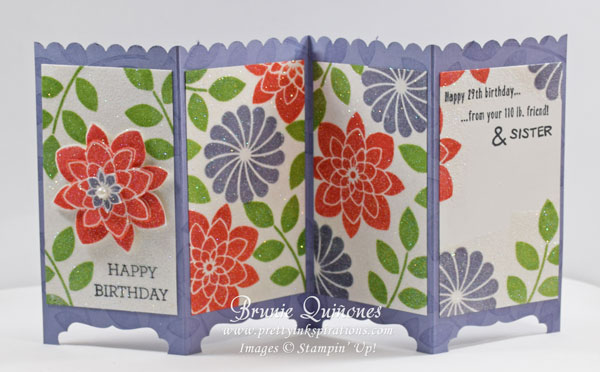
Today’s card is one I made back in May to celebrate my sister’s birthday. My sister LOVES glitter so this card was a hit – she loved it!!

I made one of these screen divider cards last year for my son & daughter-in-law’s 5 year wedding anniversary but never posted it so I decided to make another one – this time with a birthday theme. Doesn’t this card look great?! It’s so cheerful, don’t you think? I used the Crazy About You stamp and the Faux Diamond Dust Technique.
Card Details
Want to know how to make it? Here we go . . .
- Cut your card base to 5-1/2″ x 11″
- Score cardstock at 2-3/4″, 5-1/2″ and 8-1/4″
- Using a border punch, create a border on top edge of card base
- Fold your scored cardstock in half then fold the other 2 panels back; you should have a peak, valley and peak folds
- At the bottom of the card base, center the decorative label punch on each panel almost half way up on your punch and punch. Tip: To ensure that all the panels are punched evenly, I punch one panel and then line up my other panels with the first one I punched.
- Stamp leaf image using VersaMark onto your card base. Now you’ve completed the card base.
- Cut 4 panels at 2-1/2″ x 4″ and stamp your flowers with Calypso Coral, Wisteria Wonder and Old Olive inks. Stamp your sentiment with Memento Jet Black Ink.
- Ink up your panels with VersaMark and pour Heat & Stick Embossing Powder all over the panels. Shake off excess and melt powder with heat tool until it’s sticky. The Heat & Stick powder allows the glitter to really stick to your cardstock.
- Apply Iridescent Ice Embossing Powder all over panels, shake off excess and use heat tool to melt powder until shiny.
- Adhere your panels to card base.
- For the front of my card, I stamped the big flower twice and cut around it and layered it with Stampin’ Dimensionals and for the finishing touch, I placed a pearl right in the middle of the flower.
- Fold the card and it fits right into our Medium Envelopes.
Make sure to leave some space to write your your wishes for the special person.
Want to try it? Below are the items I used to make this card. Leave me a comment and tell me what you think. If you try it, let me know how it goes.
Thanks for stopping by . . . .till next time . . . Brunie
Shop at my online store for all your Stampin’ Up! supplies. Don’t forget this week’s deal (check them out on the right side of this post)
Card Supplies